

The ritual of turning an ordinary pumpkin into a jack-o-lantern is one of the most photogenic parts of Halloween. You can document the whole process and preserve your memories for years by following these tips for taking quality pictures. -Start your series of Halloween photographs right at the pumpkin patch (or grocery store)
--Go for the candid shots, instead of the posed ones.
--When it comes to photographing the actual carving process, make sure you capture the sloppy moments along with the artistic ones!
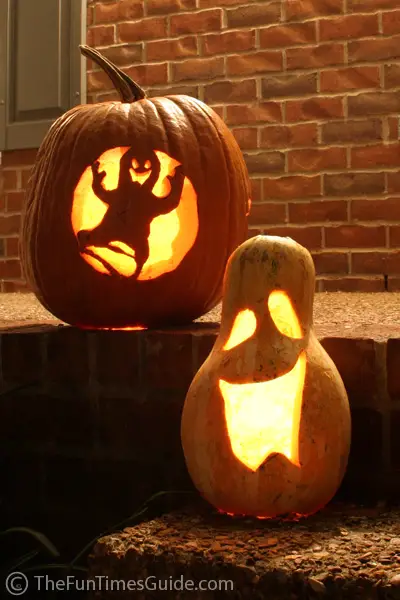
--Many people take their photos so the lighted design is all that you see, close-up. The best pictures are those in which you can see the design in relation to the actual pumpkin. Besides, seeing some of the orange pumpkin in the photograph adds some depth, as well as color! So, ideally, you will want to try to capture the glow of the light from within the pumpkin, while still being able to see the outside of the pumpkin itself.
--Resist the urge to use a flash! Instead, put even more light than usual inside your pumpkin. If you decide to take a few shots with a flash, try to make sure your flash isn't directed head-on at the pumpkin. Try placing your hand part-way over the flash to lessen the amount of light that actually hits your pumpkin. Just remember this: The less light you use, the steadier you will have to be with the camera to capture the photograph without blur.
--Remember to move in close and practically fill the entire frame with the pumpkin itself. You just barely want to be able to tell the location where the photograph was actually shot.
--For a unique background, try placing your carved pumpkin amidst some leafy vines in your backyard, or huddled within colorful flowers or shrubs. For these shots, you will want to include a bit more of the background than usual, as these items will add color and depth to your photo.
--Take pictures of your lit pumpkin at different times of the day (and night). The ones that turn out the best will most likely be those you take when it's not completely dark outside.
--For a different look, take a few pictures with an outside light (lamp, porch light, etc.) illuminating the outside of the pumpkin, preferably from the SIDE rather than head-on. This will result in a very subtle lighting effect.
--For a really creative "firey" look, place your lit pumpkin in the fireplace and make a small fire from a few sheets of newspaper directly behind it. Again, don't use a flash. The result is a truly Halloweenesce photo of your Jack-o-lantern.
--Capturing your pumpkin from different angles is also a good idea.
--The trick to good Halloween photography is simple: Take LOTS of shots! The more you take, the more you increase your odds of capturing the "money shot"... the ones suitable for framing.
--For the absolute BEST shots, you should mount your camera on a tripod and use a zoom lens. This will change the focal distance, blurring the background while keeping the pumpkin itself sharp.

How to Get the Best Photos of Kids in Halloween Costumes
Some pre-photo reminders: If you're using a film camera, make sure you have ISO 400 or 800 loaded. And, if you're using a digital camera, then remember to insert a fresh set of batteries (or charge up your battery the night before)!
-When you take a picture of your favorite trick-or-treater in costume, have someone shine a flashlight from off to one side of the child or from below. This will produce a unique lighting effect for your pictures.
-The biggest mistake people make is to shoot from too far back. You don't always have to shoot from head-to-toe (especially since shoes are often the weakest part of a costume). Instead, get in close and fill the frame. ...and, take some shots where you fill the frame with just the child's head and shoulders.
-Usually, you'll want to avoid red-eye in your Halloween photographs of people, but if you're shooting a vampire or some other spooky character, the red-eye will add a great effect!
-Don't always shoot from adult-level looking down on the little ones. Take some shots from a child's-eye-level too. You'll have to bend down low in order to capture the child's perspective. Or for a really cool perspective, lie down somewhere near the child and take the shot.
-Make sure to take a photo of your favorite creature with and without the mask. You'll appreciate it later.
-Use an interesting background instead of a bare wall as a backdrop for your photos. Trees, big bushes, and vines make for a spooky setting.
-Capture kids in costume from lots of different angles. ...including from down low, up high, and some from kids-eye level.
-Take pictures of costumed kids both before and after they've gone trick-or-treating. One will show their costume and makeup neat and intact and their energy level high, filled with anticipation about going door-to-door. The other will reveal their true personality and how they looked when they returned home at the end of the evening; most likely exhausted, grumpy and ready to call it a night!


No comments:
Post a Comment